Using Ansible for Connectware Orchestration
Prerequisites
In this lesson we will set up a local Cybus Connectware Instance using Ansible.
As a prerequisite, it is necessary to have Ansible, Docker and Docker Compose installed on your system as well as a valid Connectware License on hand.
Docker shouldn’t be installed using snapcraft!
We assume you are already familiar with Cybus Connectware and its service concept. If not, we recommend reading the articles Connectware Technical Overview and Service Basics for a quick introduction. Furthermore this lesson requires basic understanding of Docker and Ansible. If you want to refresh your knowledge, we recommend looking at the lesson Docker Basics and this Ansible Getting started guide.
Introduction
Ansible is an open-source provisioning tool enabling infrastructure as code. Cybus provides a set of custom modules (Collection) exclusively developed to manage every part of a Connectware Deployment, seamlessly integrated into the Ansible workflow. With only a few lines of code you can describe and roll out your whole infrastructure, including services, users and many more.
The collection provides the following modules:
- instance | Manages Connectware Instances
- service | Manages Connectware Services
- role | Manages Connectware Roles
- user | Manages Connectware Users
- agent | Manages Agent Instances
Ansible Collection Installation
First of all we have to make sure that the Connectware Ansible Collection is present on our system. The Collection is available for Download on Ansible Galaxy.
Installing the Collection is fairly easy by using Ansible Tools:
$ ansible-galaxy collection install cybus.connectware
Code-Sprache: YAML (yaml)
To get a list of all installed collections you can use the following command:
$ ansible-galaxy collection list
Code-Sprache: YAML (yaml)
If you already have installed the collection you can force an update like this:
$ ansible-galaxy collection install cybus.connectware --force
Code-Sprache: YAML (yaml)
Writing Our First Playbook
To provide Ansible with all the information that is required to perform the Connectware installation, we need to write a short playbook. Create a empty folder and a file called playbook.yaml with the following content:
- name: Connectware Deployment
  hosts: localhost

  tasks:
    - name: Deploy Connectware
      cybus.connectware.instance:
        license: ***
        install_path: ./
Code-Sprache: YAML (yaml)
Taking the file apart we define one play named Connectware Deployment which will be executed on the given hosts. The only host in our case is the localhost.
Then we define all the tasks to be executed. We only have one task called Deploy Connectware. The task takes a module to be executed along with some configuration parameters. For now we only specify parameters for the licence and the install_path. Make sure to replace the *** with your actual licence key. The install_path will be the one you created your playbook in.
There are a lot more parameters to use with this module, but the only required one is license. To see a full list use this command:
$ ansible-doc cybus.connectware.instance
Code-Sprache: YAML (yaml)
For running the playbook open a shell in the newly created folder and execute this command (execution may take a few minutes):
$ ansible-playbook playbook.yaml
Code-Sprache: YAML (yaml)
The output should look somewhat similar to this.
Notice that the state of the Deploy Connectware task is marked as changed. This indicates that the Connectware is now running and is reachable at https://localhost.
Beside the log output you should now find two new files beside the playbook.yaml. One file is the actual docker compose file managing the Connectware Containers and the other one is holding some additional configurations.
[WARNING]: No inventory was parsed, only implicit localhost is available
[WARNING]: provided hosts list is empty, only localhost is available. Note that the implicit localhost does not match 'all'

PLAY [Connectware Deployment] ***************************************************************************

TASK [Gathering Facts] ***************************************************************************
ok: [localhost]

TASK [Deploy Connectware] ***************************************************************************
changed: [localhost]

PLAY RECAP ***************************************************************************
localhost: ok=2    changed=1    unreachable=0    failed=0    skipped=0    rescued=0    ignored=0
Code-Sprache: YAML (yaml)
If you like you can rerun the exact same command, which will result in no operation, since the Connectware already has the desired state. As you can see, this time there is no changed state.
$ ansible-playbook playbook.yaml
[WARNING]: No inventory was parsed, only implicit localhost is available
[WARNING]: provided hosts list is empty, only localhost is available. Note that the implicit localhost does not match 'all'

PLAY [Connectware Deployment] ***************************************************************************

TASK [Gathering Facts] ***************************************************************************
ok: [localhost]

TASK [Deploy Connectware] ***************************************************************************
ok: [localhost]

PLAY RECAP ***************************************************************************
localhost                  : ok=2    changed=0    unreachable=0    failed=0    skipped=0    rescued=0    ignored=0
Code-Sprache: YAML (yaml)
Installing a Service
Now that we have a running Cybus Connectware instance, we go a step further and install a Service. First thing we have to do is to create the Service Commissioning File. We will use a very simple Service for demonstration purposes. Create a file called example-service.yml and paste in the following content:
---
description: Example Service

metadata:
  name: example_service

resources:

  mqttConnection:
    type: Cybus::Connection
    properties:
      protocol: Mqtt
      connection:
        host: !ref Cybus::MqttHost
        port: !ref Cybus::MqttPort
        scheme: mqtt
        username: !ref Cybus::MqttUser
        password: !ref Cybus::MqttPassword
Code-Sprache: YAML (yaml)
There is really not much going on here than simply creating a connection to the internal Connectware Broker.
Next we have to enrich our playbook by appending another task like this:
    - name: Install Service
      cybus.connectware.service:
        id: example_service
        commissioning_file: ./example-service.yml
Code-Sprache: YAML (yaml)
The task uses another module of the collection for managing services. The required parameters are id and commissioning_file.
You can learn more about the module by using this command:
$ ansible-doc cybus.connectware.service
Code-Sprache: YAML (yaml)
When executing the playbook again, you should see similar output to this:
$ ansible-playbook playbook.yaml
[WARNING]: No inventory was parsed, only implicit localhost is available
[WARNING]: provided hosts list is empty, only localhost is available. Note that the implicit localhost does not match 'all'

PLAY [Connectware Deployment] ***************************************************************************

TASK [Gathering Facts] ***************************************************************************
ok: [localhost]

TASK [Deploy Connectware] ***************************************************************************
ok: [localhost]

TASK [Install Service] ***************************************************************************
changed: [localhost]

PLAY RECAP ***************************************************************************
localhost: ok=3    changed=1    unreachable=0    failed=0    skipped=0    rescued=0    ignored=0
Code-Sprache: YAML (yaml)
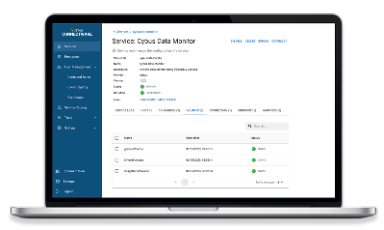
When visiting the Connectware UI Services page you should now see the service being installed and enabled (https://localhost/admin/#/services).
Stopping Connectware
Every module supports different states. The default state of the instance module for example is started. To stop the Connectware we define another task, use the instance module and define the state to be stopped.
    - name: Stopping Connectware
      cybus.connectware.instance:
        state: stopped
        license: ***
        install_path: ./
Code-Sprache: YAML (yaml)
After executing the playbook once more, the Cybus Connectware should no longer be running.
Next Steps for Using Ansible
All the steps described above are really basic and there is so much more to learn and discover.
The recommended next steps are:
- Ansible Connectware Collection inside Docker #add Link
- Automated Connectware Deployment using GitLab CI/CD and Ansible
Need more help?
Can’t find the answer you’re looking for?
Don’t worry, we’re here to help.


